As a nursing student, it's important to have a thorough understanding of the different types of injections and their corresponding sites. Proper administration of injections is a crucial skill for nurses, as it can greatly impact the efficacy of medications and patient outcomes. In this blog post, we will discuss the four common types of injections, their procedures, precautions, and commonly used sites. Additionally, we will recommend some products for nursing students to practice their injection skills and aid in classroom learning.
1. Intramuscular (IM) Injection
The intramuscular injection is given into the muscle, typically the deltoid, gluteus maximus, or vastus lateralis. The steps for administering an IM injection are as follows:
- Clean the injection site with an alcohol swab.
- Hold the syringe like a pencil and insert the needle into the muscle at a 90-degree angle.
- Aspirate to check for blood; if there is none, inject the medication slowly.
- Remove the needle and apply pressure with a cotton ball or sterile gauze.
Precautions for IM injections:
- Avoiding areas with scars, bruises, or inflammation
- Using a longer needle for larger muscles, and not injecting more than the recommended volume into one site
 |
 |
 |
2. Subcutaneous (SC) Injection
Subcutaneous injections are given into the fatty tissue below the skin, typically on the abdomen, thigh, or upper arm. The steps for administering an SC injection are as follows:
- Clean the injection site with an alcohol swab.
- Pinch the skin and insert the needle at a 45-degree angle.
- Aspirate to check for blood; if there is none, inject the medication slowly.
- Remove the needle and apply pressure with a cotton ball or sterile gauze.
Precautions for SC injections:
- Rotating injection sites to prevent scarring
- Using an appropriate needle length for the patient's body size and tissue thickness
We have developed several injection pads and injection simulators that you can wear on the abdomen, thigh, or upper arm used for subcutaneous injection training in a safe environment.
 |
 |
 |
3. Intradermal (ID) Injection
Intradermal injections are given into the top layer of skin, typically on the forearm. These injections are commonly used for diagnostic tests such as tuberculosis screening. The steps for administering an ID injection are as follows:
- Clean the injection site with an alcohol swab.
- Hold the syringe like a pencil and insert the needle at a 15-degree angle.
- Inject a small amount of medication just beneath the skin.
- Remove the needle and apply pressure with a cotton ball or sterile gauze.
Precautions for ID injections:
- Avoiding areas with scars, veins, or moles
- Not injecting more than the recommended volume into one site
There are lots of ID injection training models that I want to share with you. You can practice the intradermal injection technique with in-time feedback.
 |
 |
 |
4. Intravenous (IV) Injection
Intravenous injections are given directly into the vein and are typically administered by trained professionals in a hospital or clinical setting. The steps for administering an IV injection are as follows:
- Clean the injection site with an alcohol swab.
- Insert a sterile needle into the vein at a 15- to 30-degree angle.
- Secure the needle in place with tape or a sterile dressing.
- Connect the syringe or IV tubing to the needle and slowly inject the medication.
Precautions for IV injections:
- Check for allergies
- Administer the medication slowly to avoid adverse reactions
- Monitor the patient for any signs of complications
 |
 |
 |
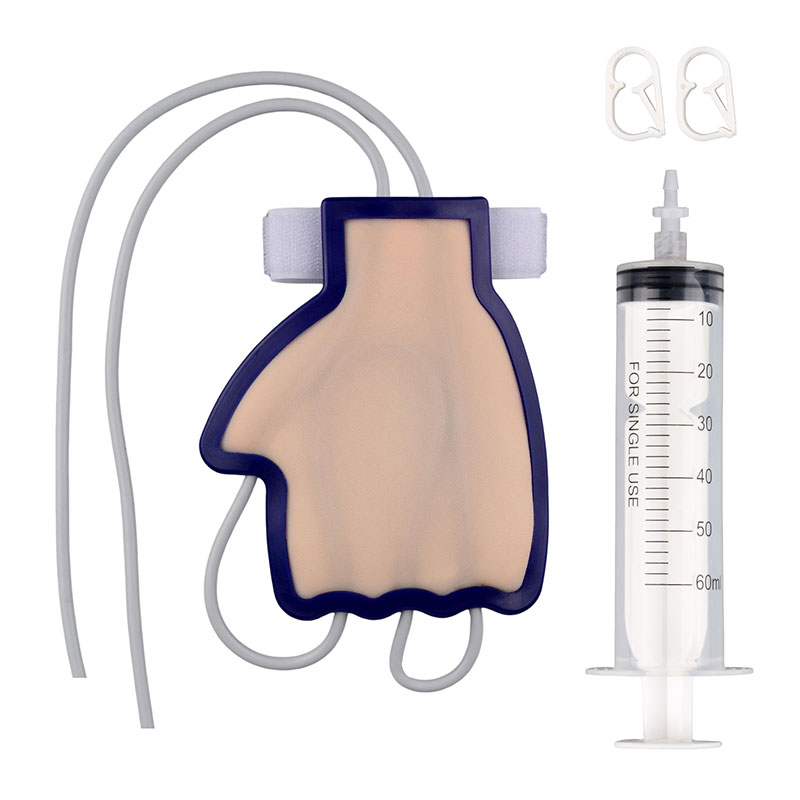
There are lots of models for IV practice. We should know the preferred veins for intravenous catheter insertion. Confirm the vein's location and find the right models that come with these veins correctly positioned for realistic IV practice. Generally, the same model also can be used to practice venipuncture and blood draw techniques, such as IV practice hand.
5. Intraosseous (IO) Injection
Intraosseous (IO) injection delivers medication or fluids directly into the bone marrow, providing rapid vascular access in emergencies when IV access is difficult. IO injections are typically performed by trained professionals in pre-hospital or emergency settings.
Steps for IO Injection:
- Identify the IO injection site (e.g., proximal tibia, distal tibia, or proximal humerus).
- Clean the site with antiseptic.
- Insert the IO needle using a drill or manual device.
- Confirm placement with bone marrow aspiration or smooth fluid flow.
- Secure the needle and administer fluids or medication.
Precautions:
- Use appropriate needle size and site.
- Avoid infected or fractured areas.
- Monitor for complications like extravasation or infection.
 |
 |
 |
Get preferred IO Trainers for beginners to practice and perfect intravenous access techniques.
Related Articles:


.jpg?w=1600&h=1600)
.jpg?w=1600&h=1600)

.jpeg?w=1500&h=1500)
.jpg?w=1500&h=1500)
.jpg?w=1500&h=1500)
.jpg?w=1600&h=1600)
.jpg?w=1600&h=1600)


.jpeg?w=800&h=800)
.jpeg?w=1500&h=1500)
.jpg?w=1600&h=1600)
.jpg?w=1600&h=1600)
.jpeg?w=1500&h=1500)
.jpeg?w=1500&h=1500)


.jpeg?w=1600&h=1600)
.jpeg?w=1600&h=1600)